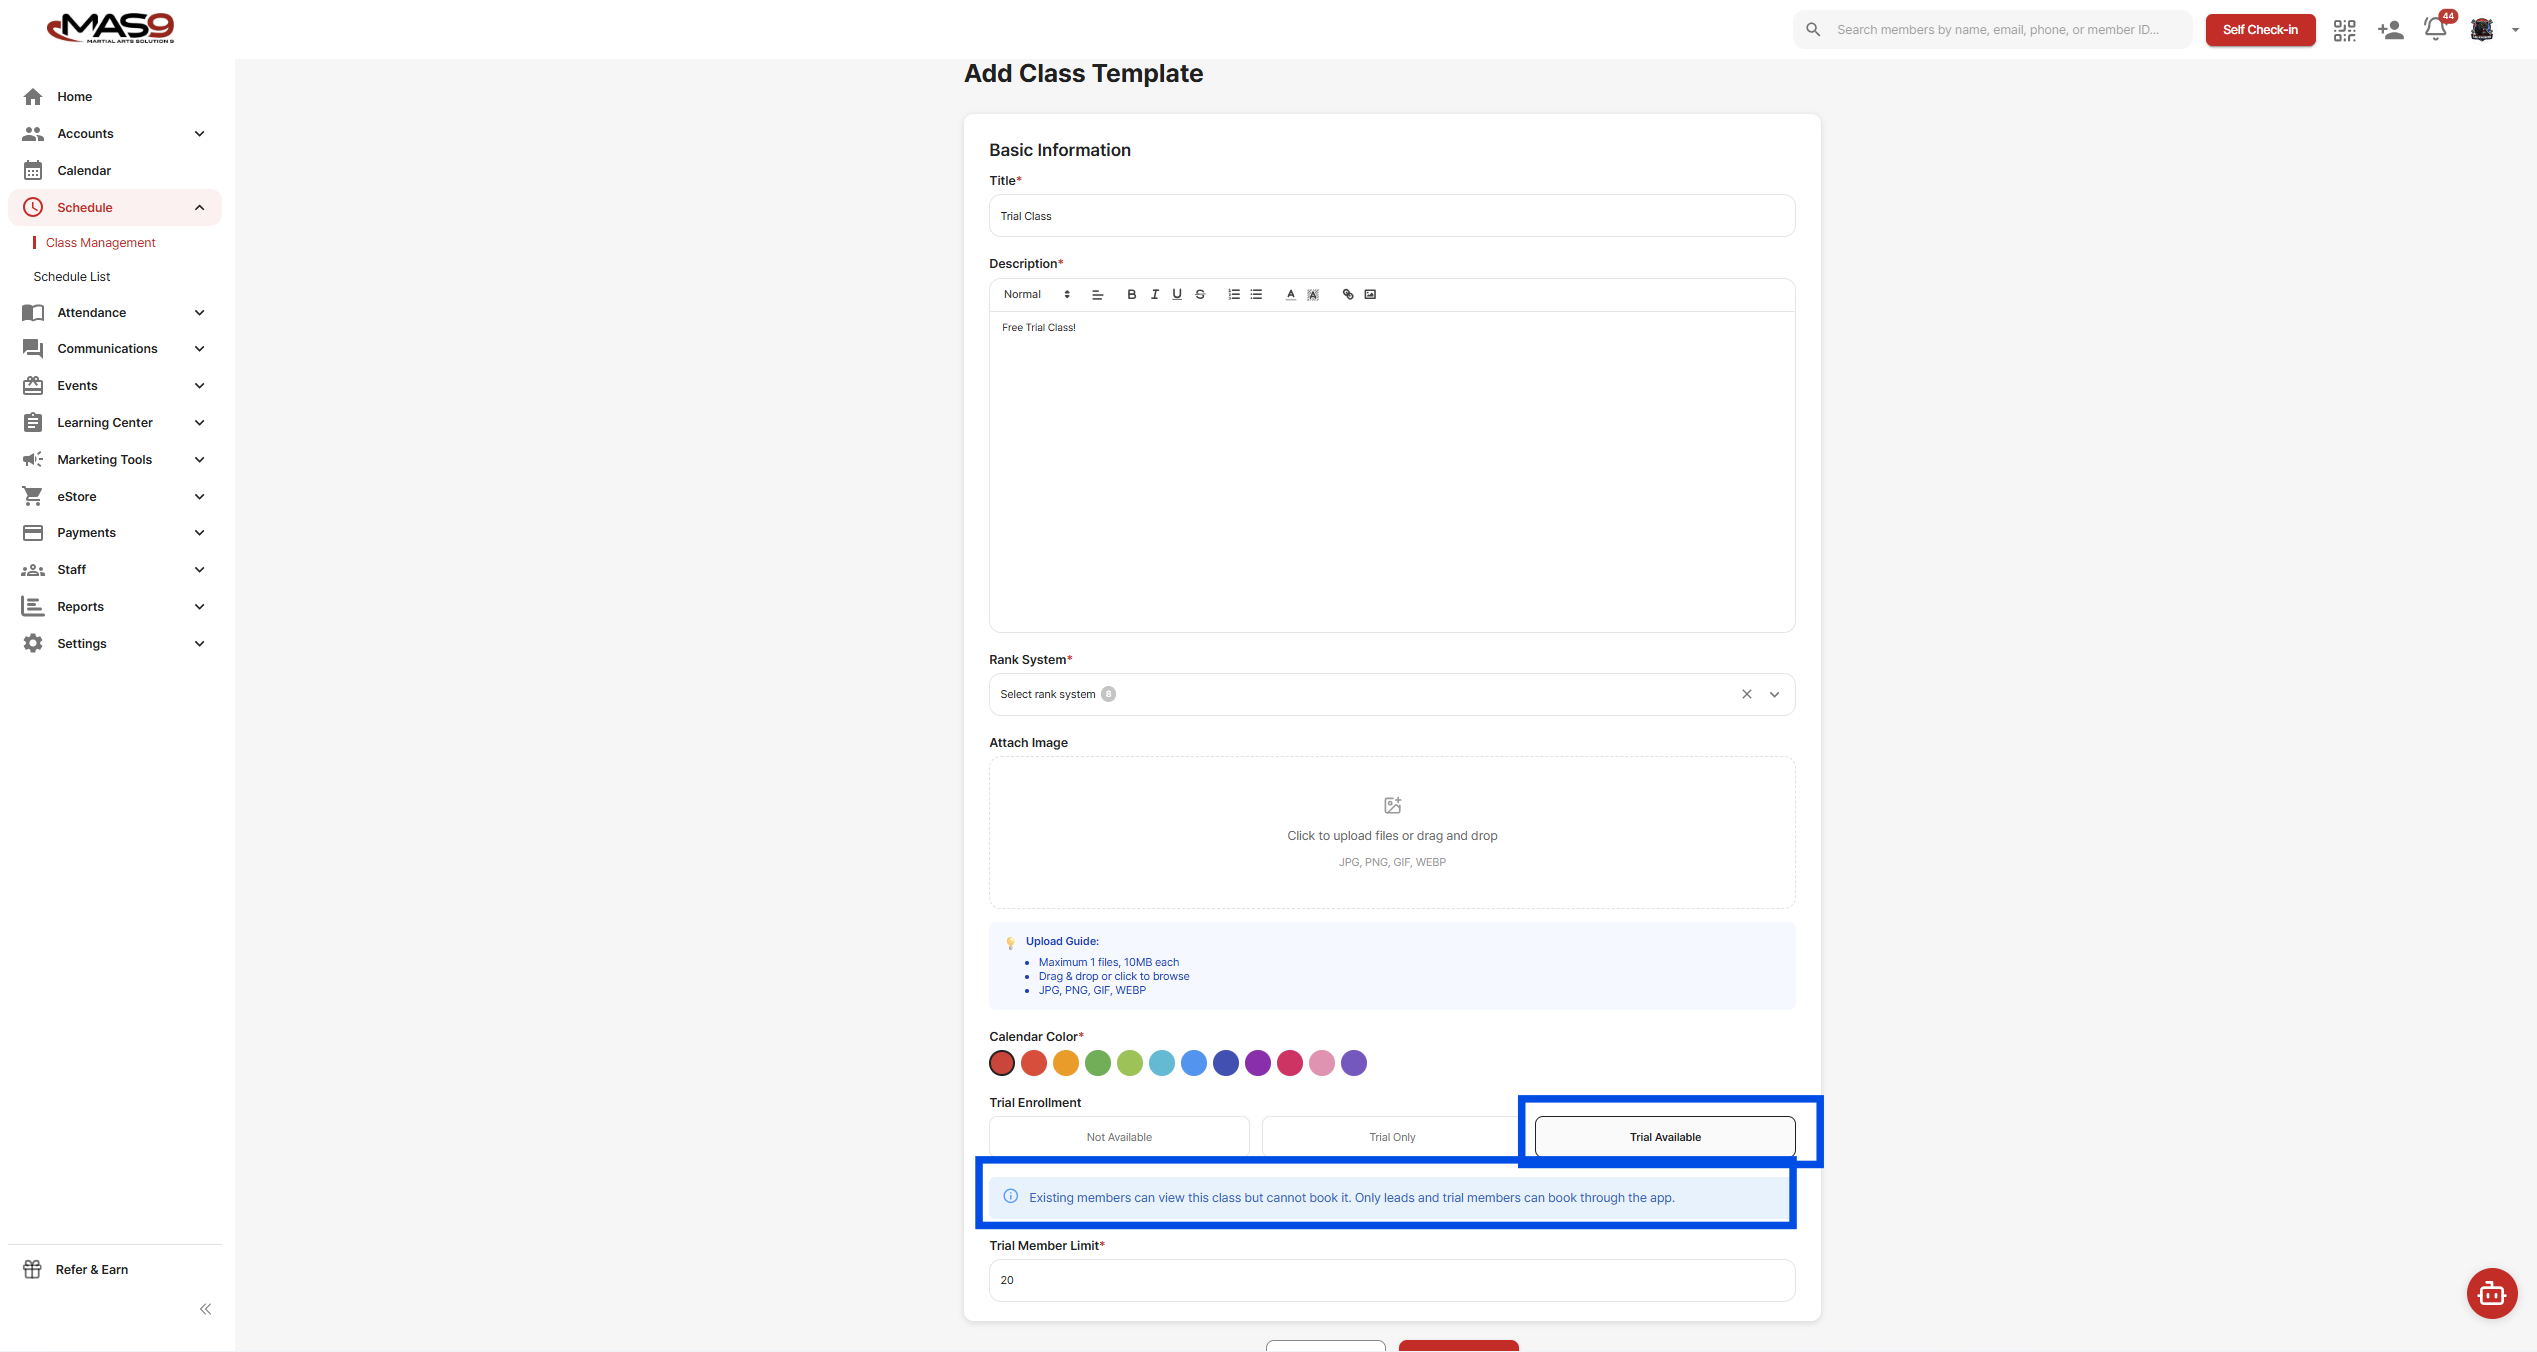
1. Create a Class Program
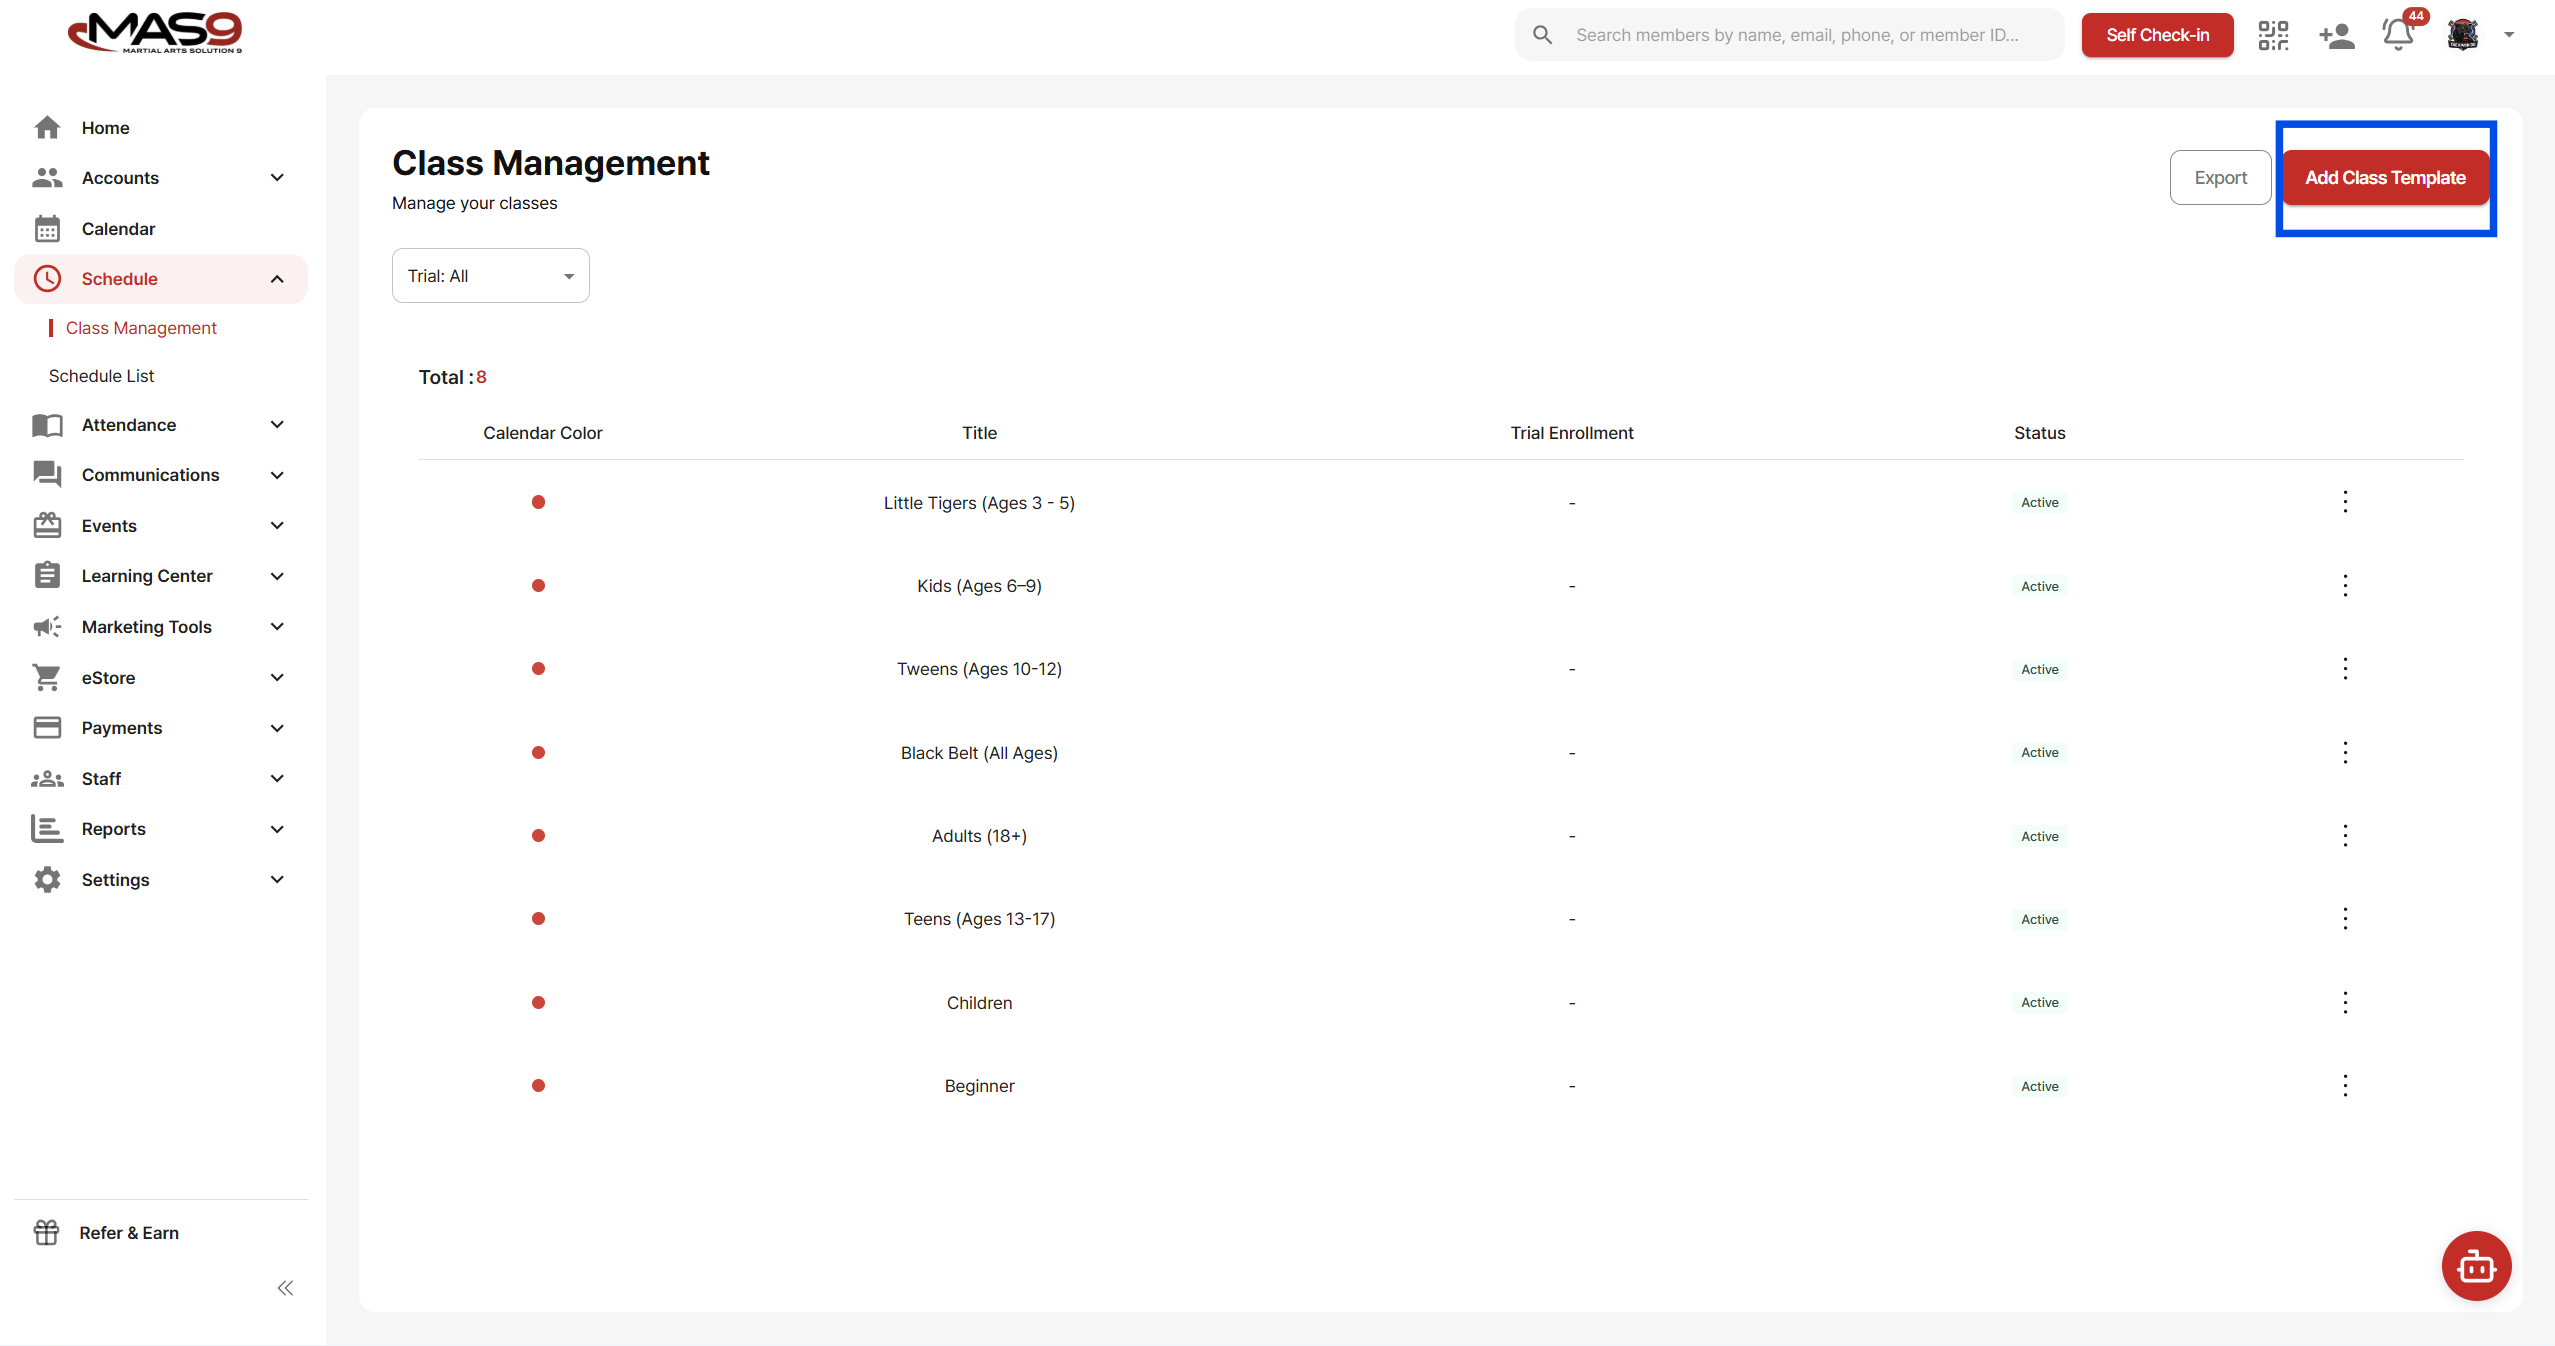
Go to: Schedule → Class Management → Add Class Template
Enter your class details (title, description, rank system, etc.).
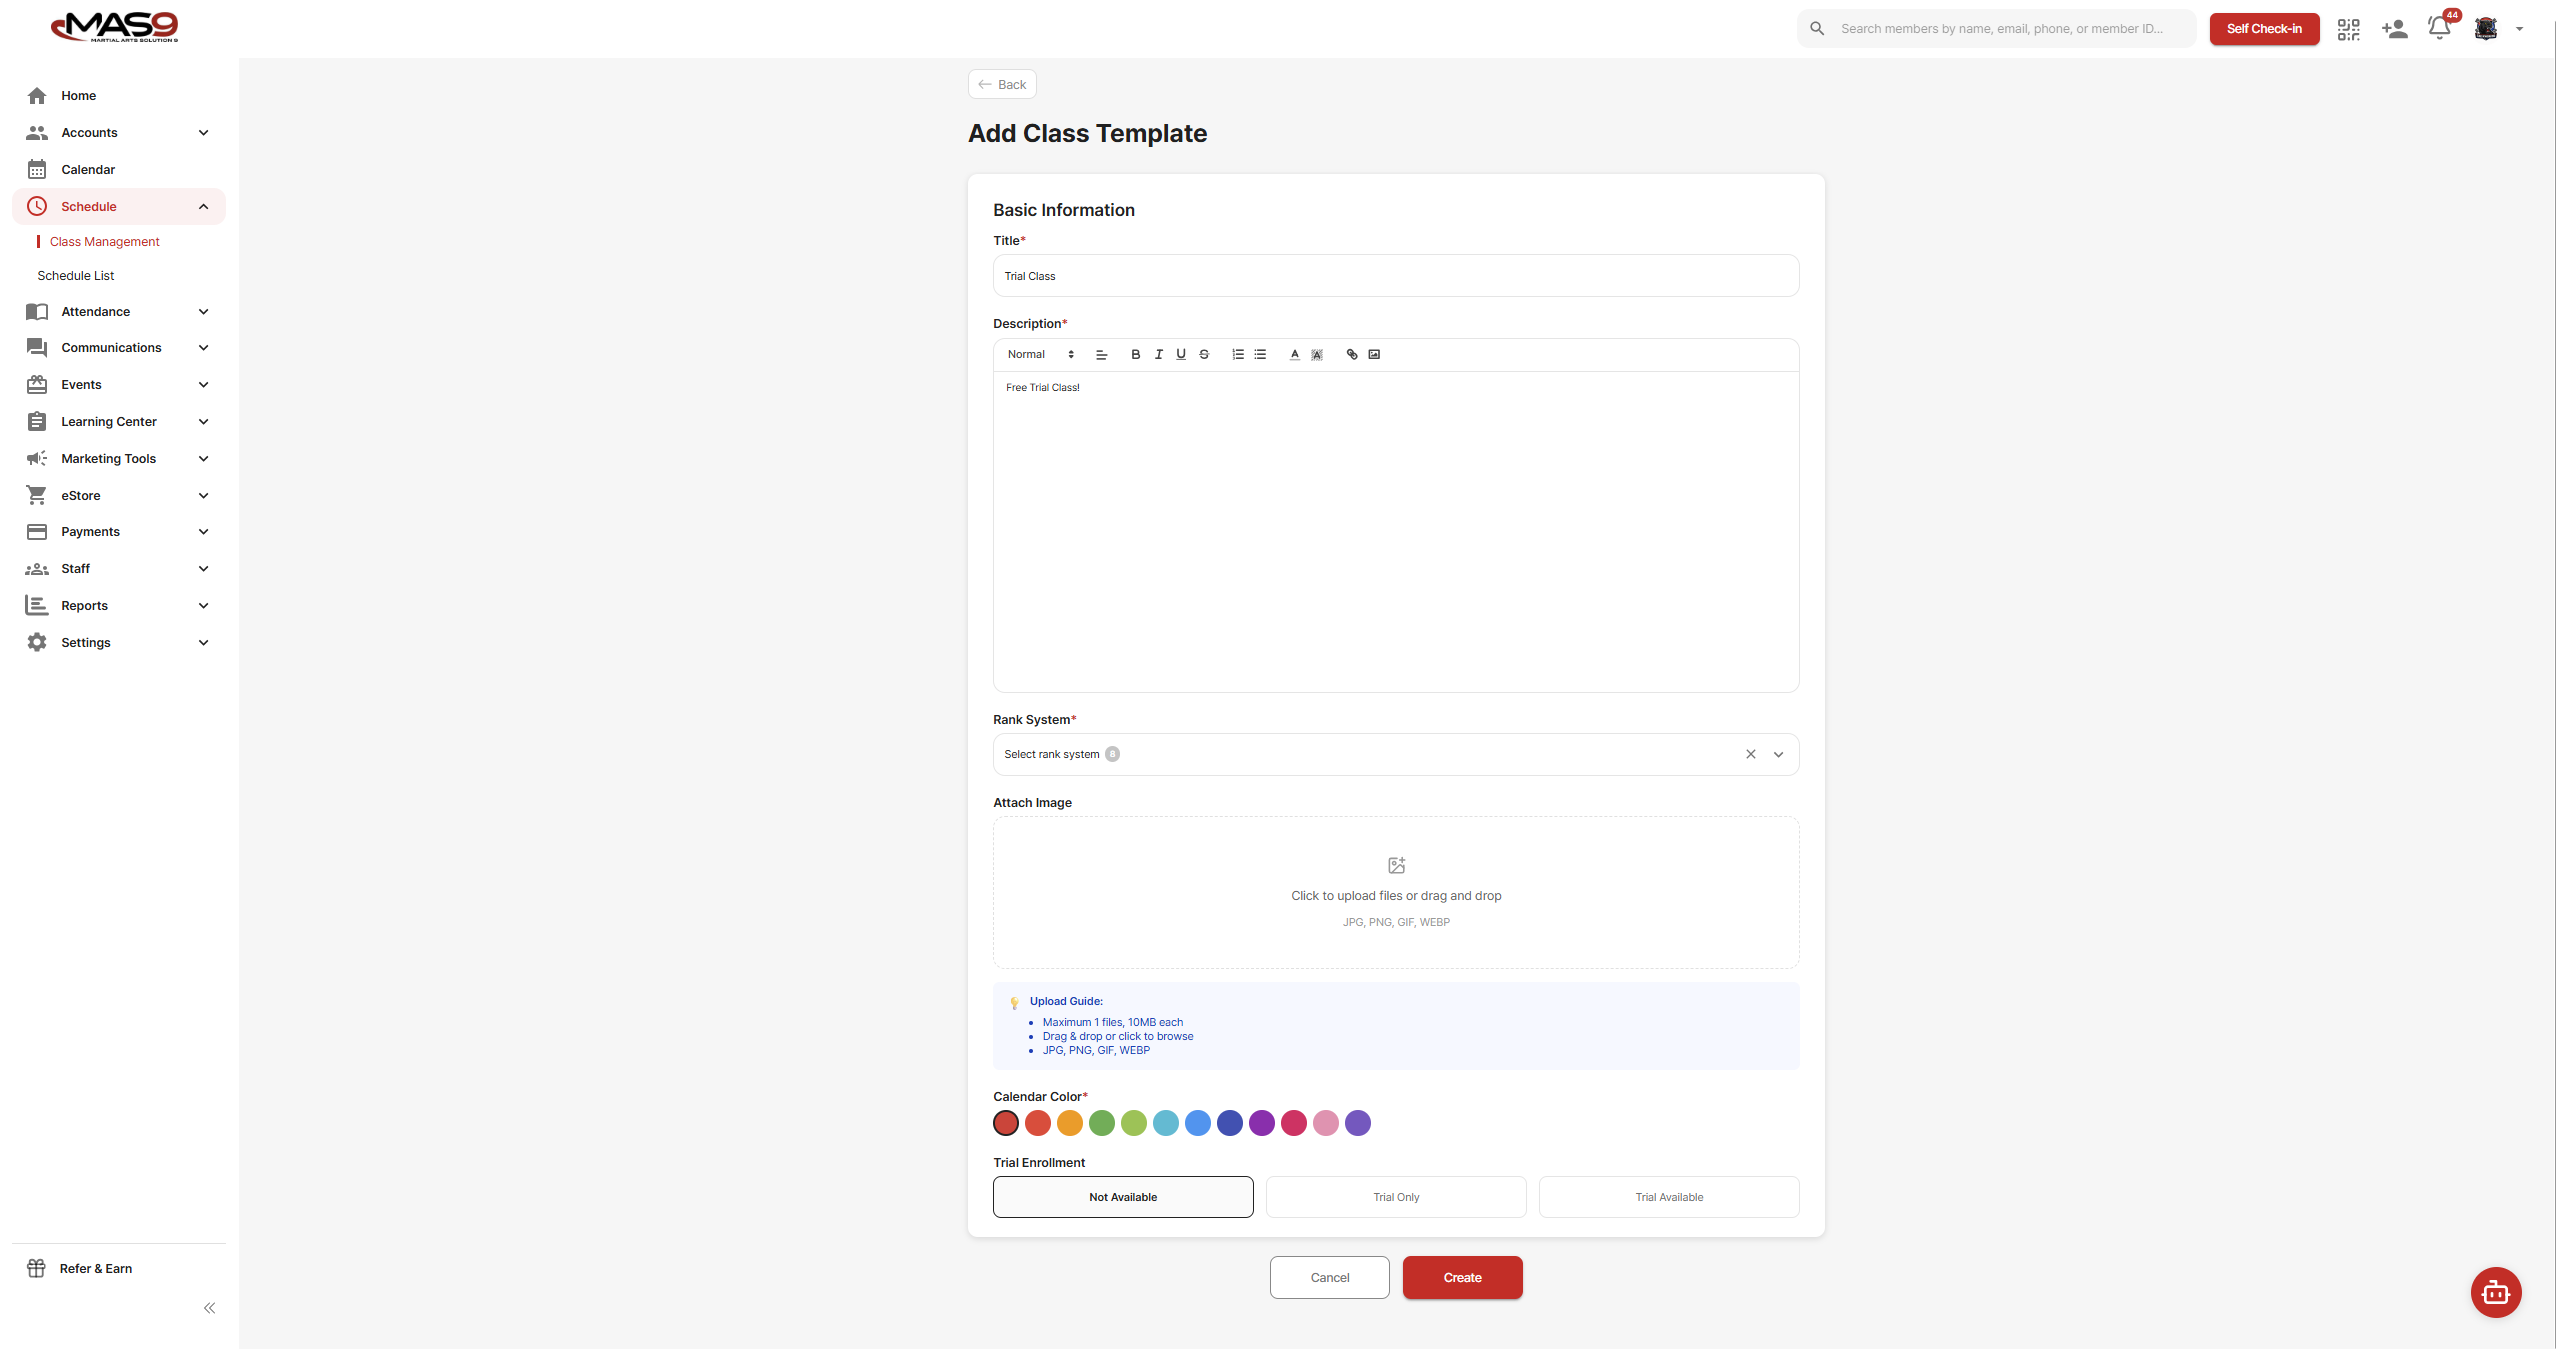
Trial Enrollment (Important)
You’ll need to choose how this class behaves for trial students:
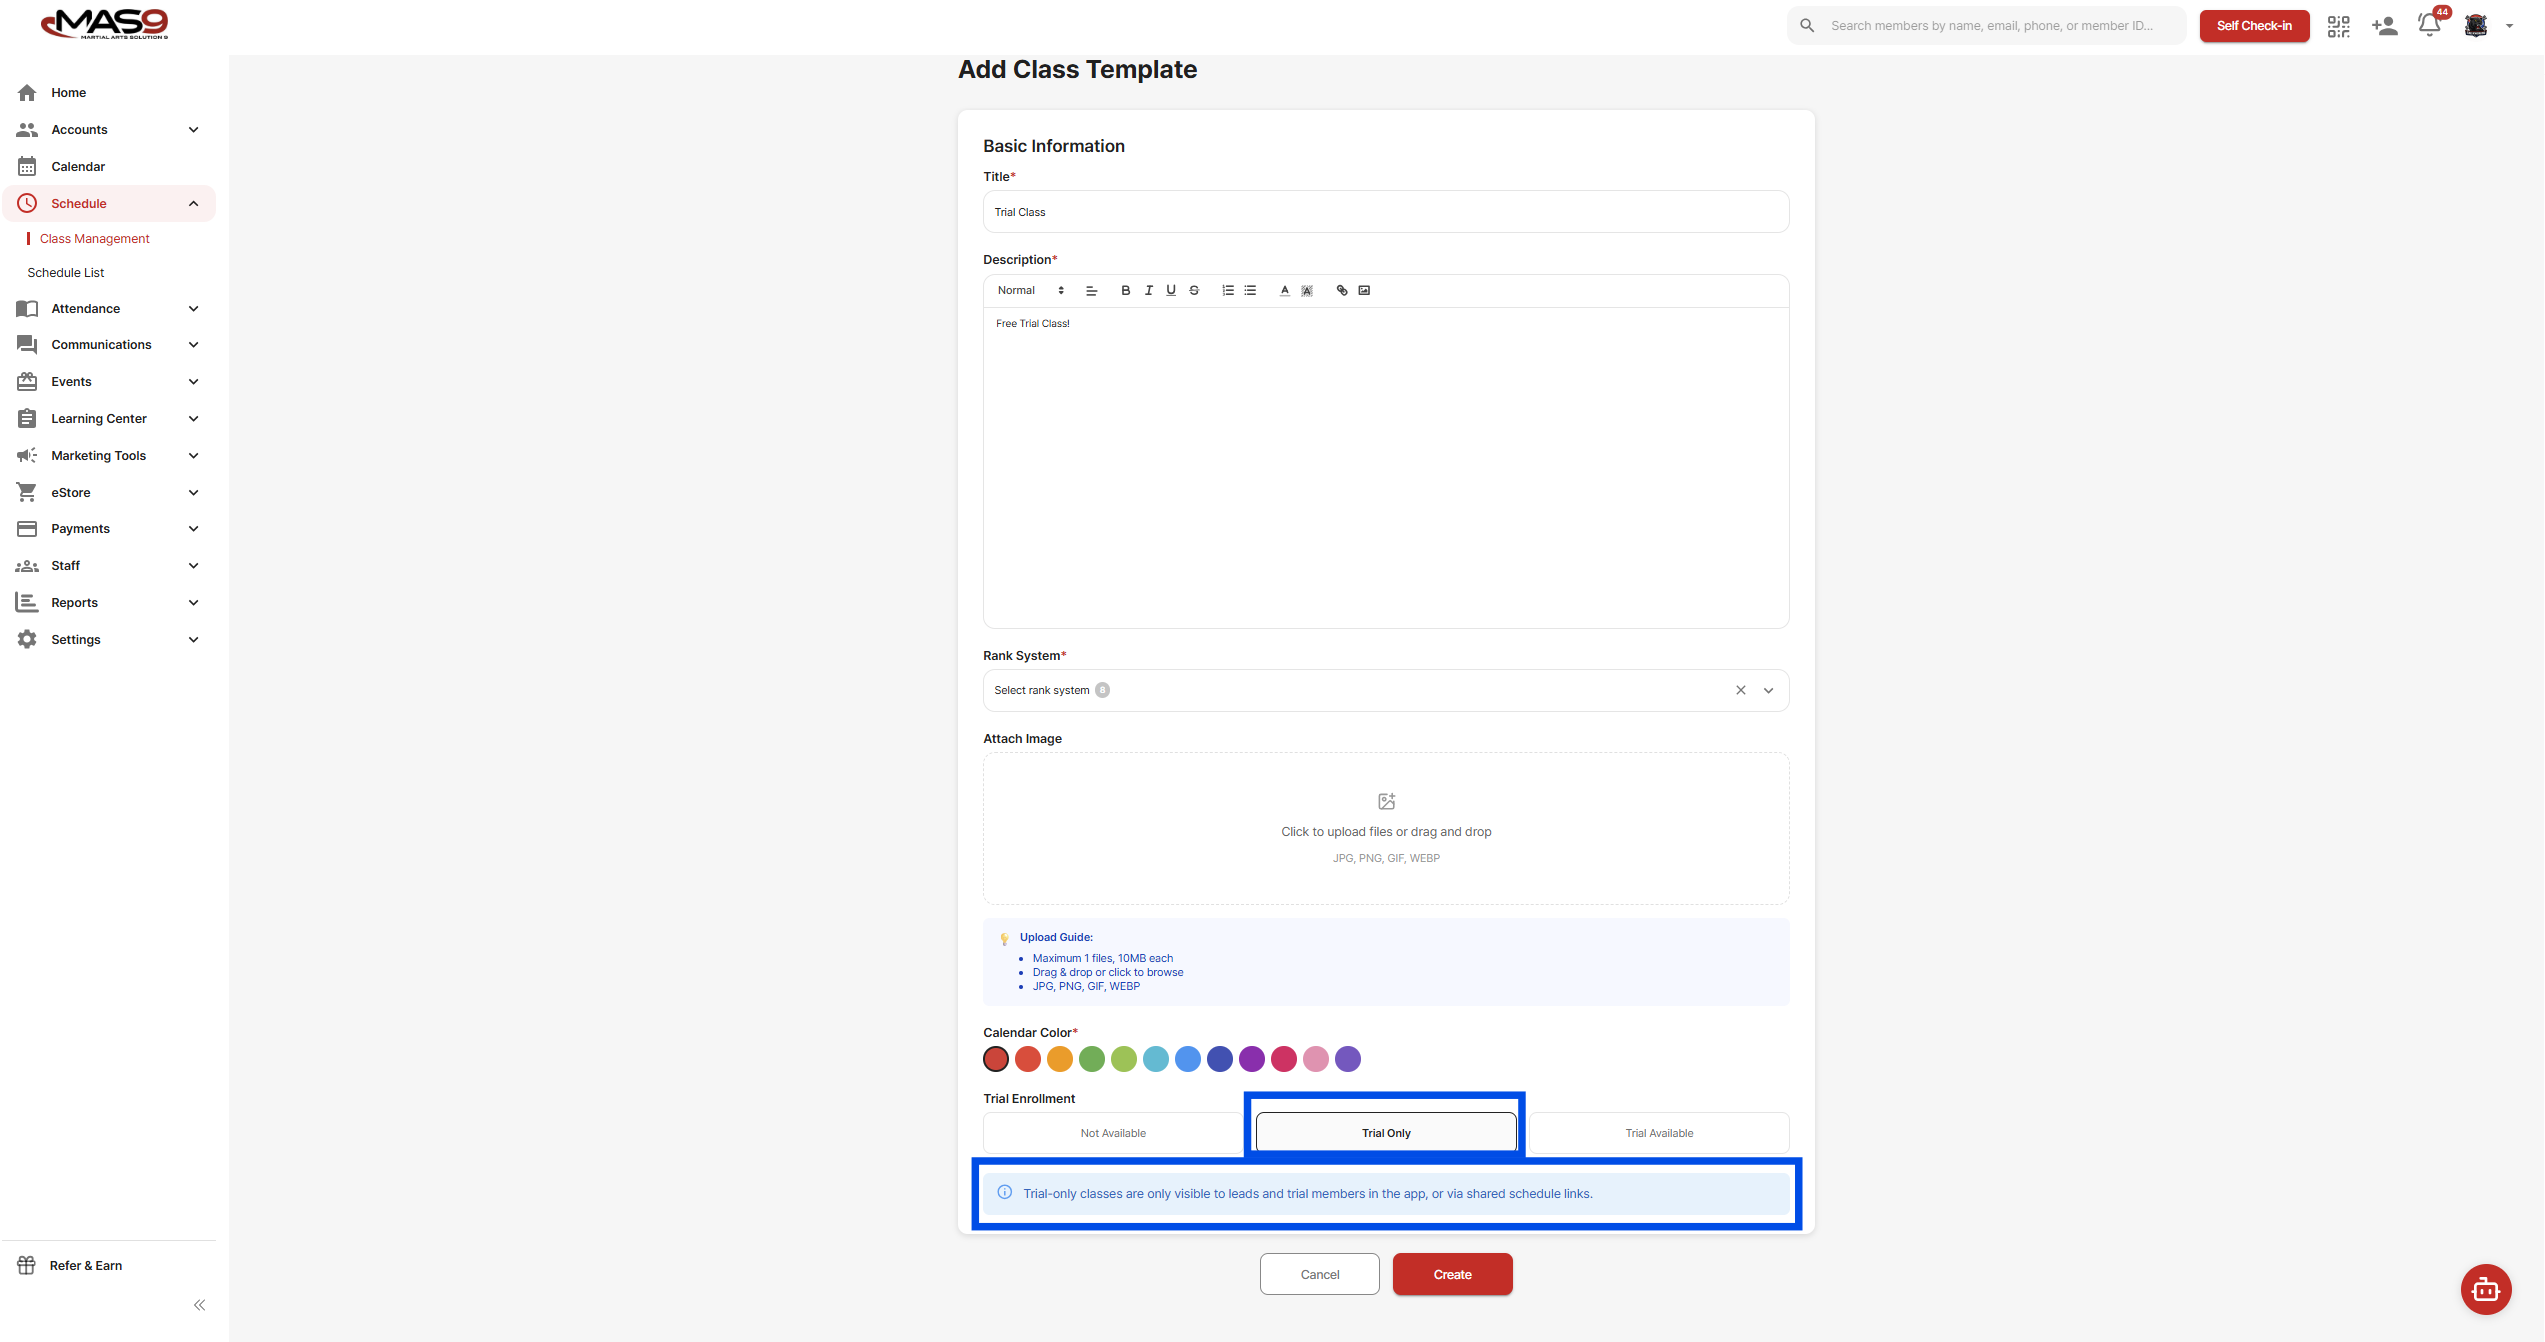
Trial Only
This class is only shown to leads and trial members (not regular members). Use this for dedicated intro or beginner trial classes.
Trial Available
This is a regular class that trial students can join. Active members can see the class, but only leads and trial members can book it.
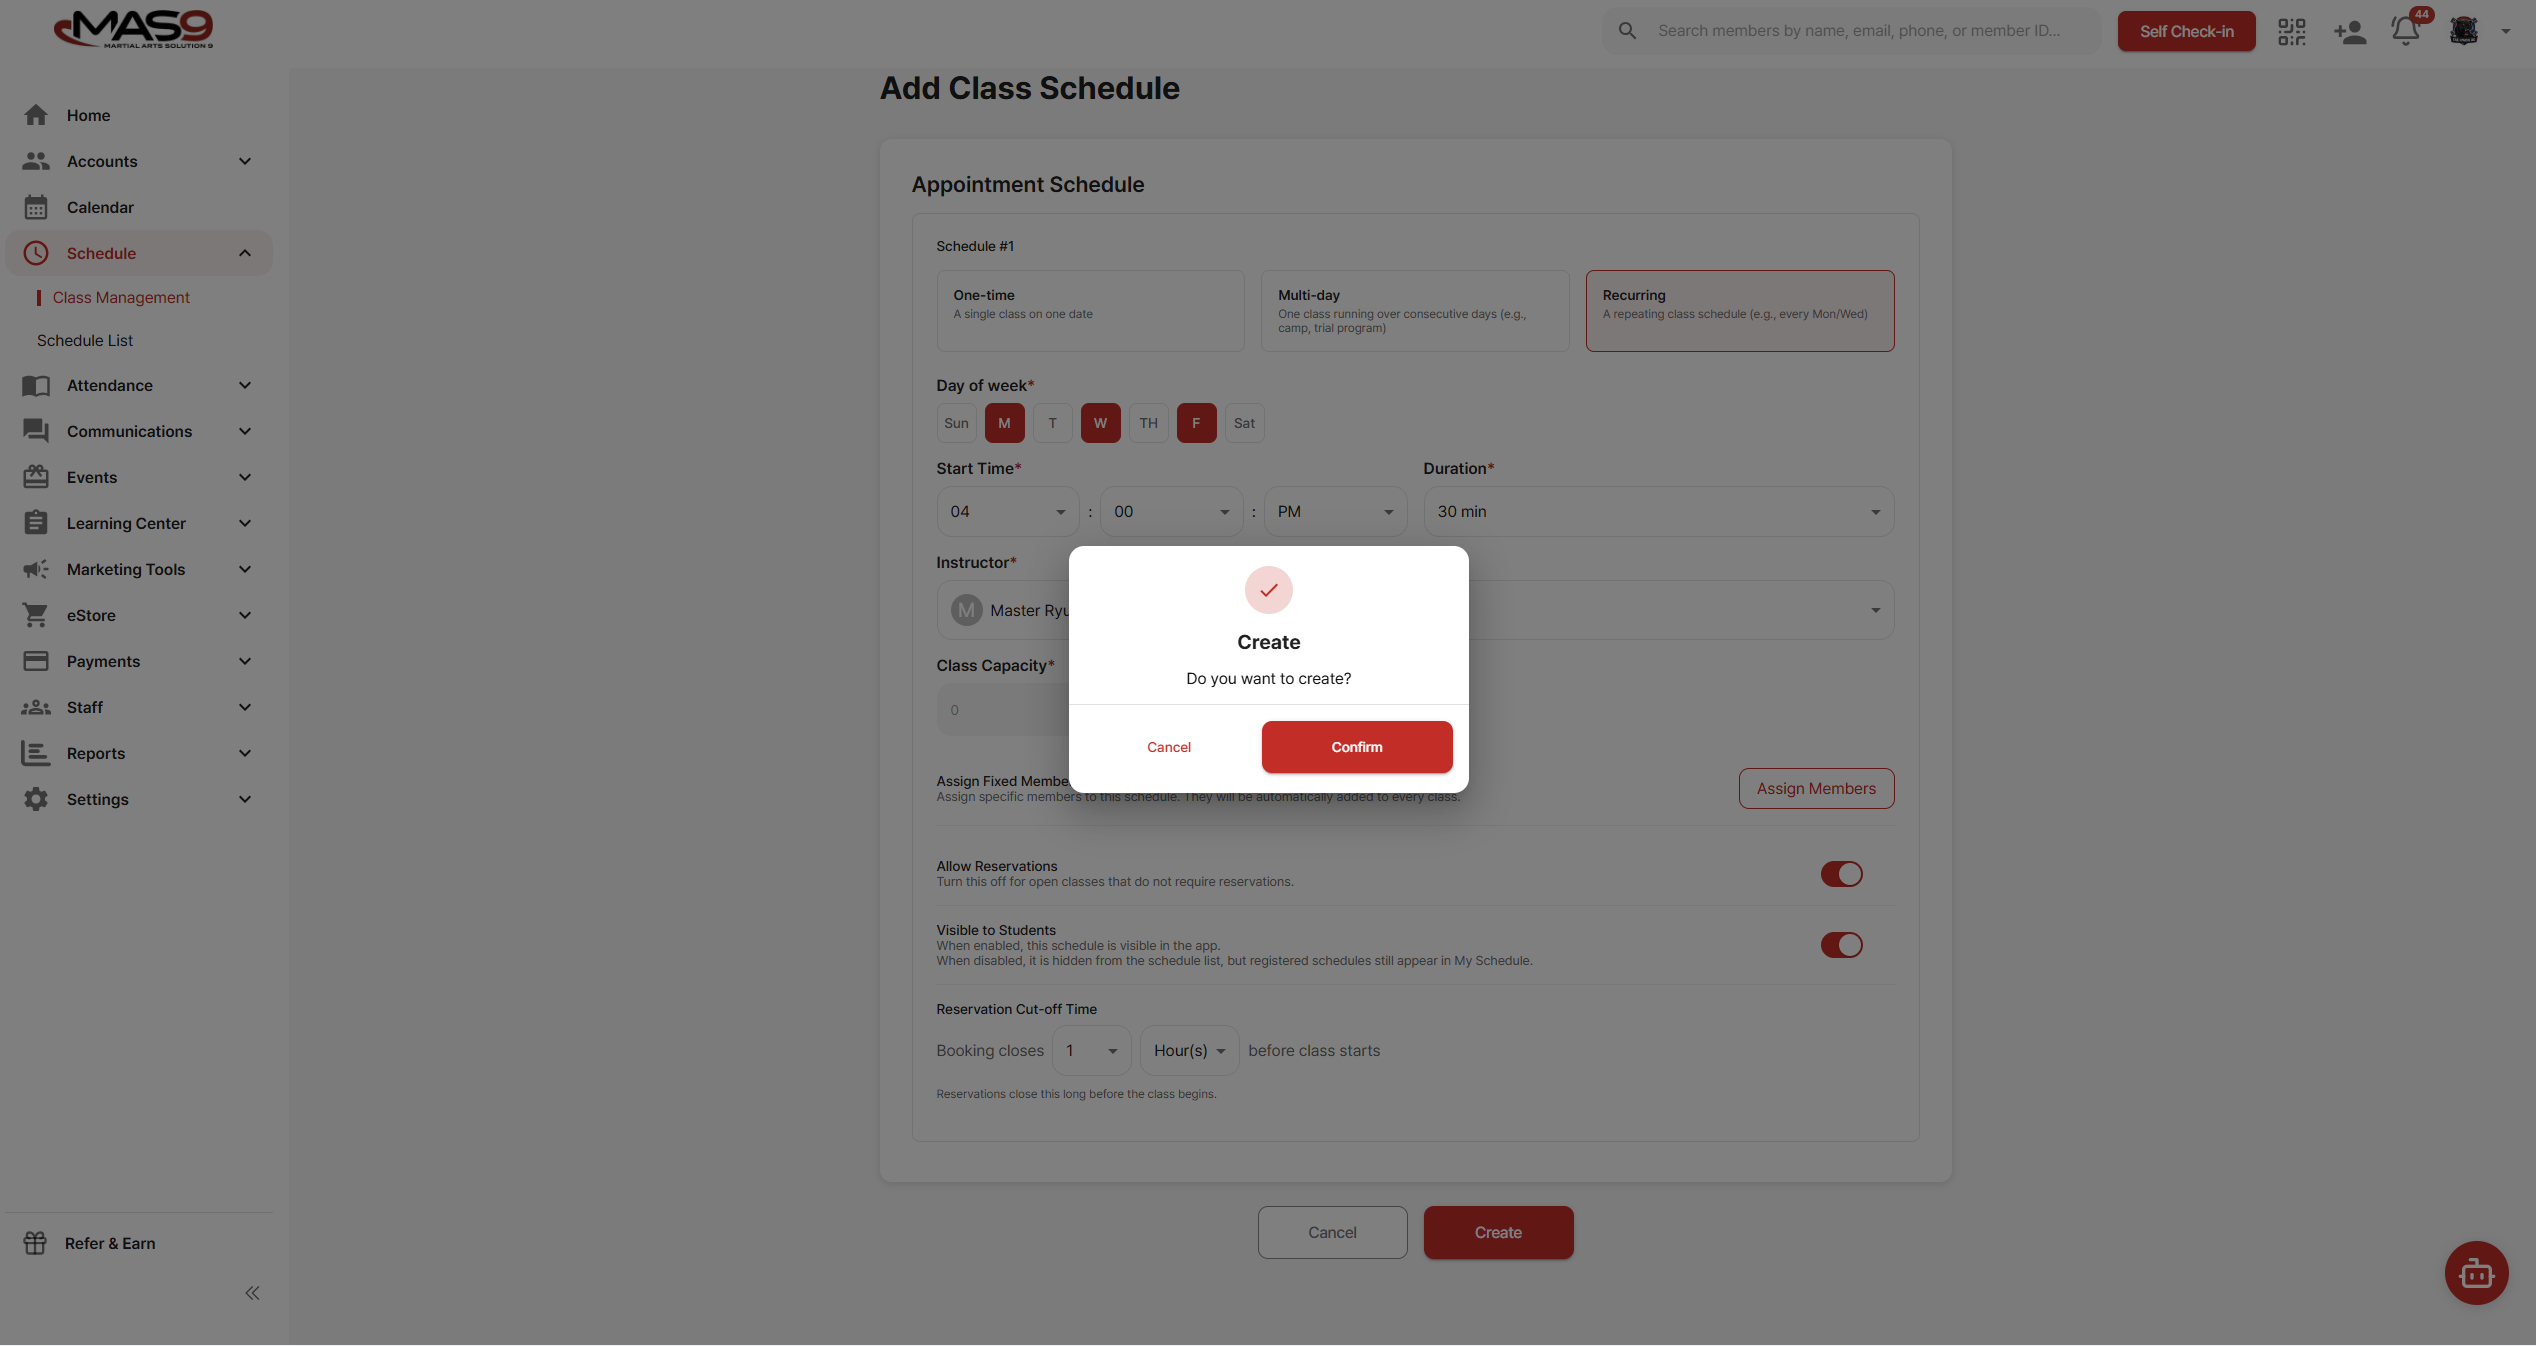
Once selected, click Create, then Confirm.
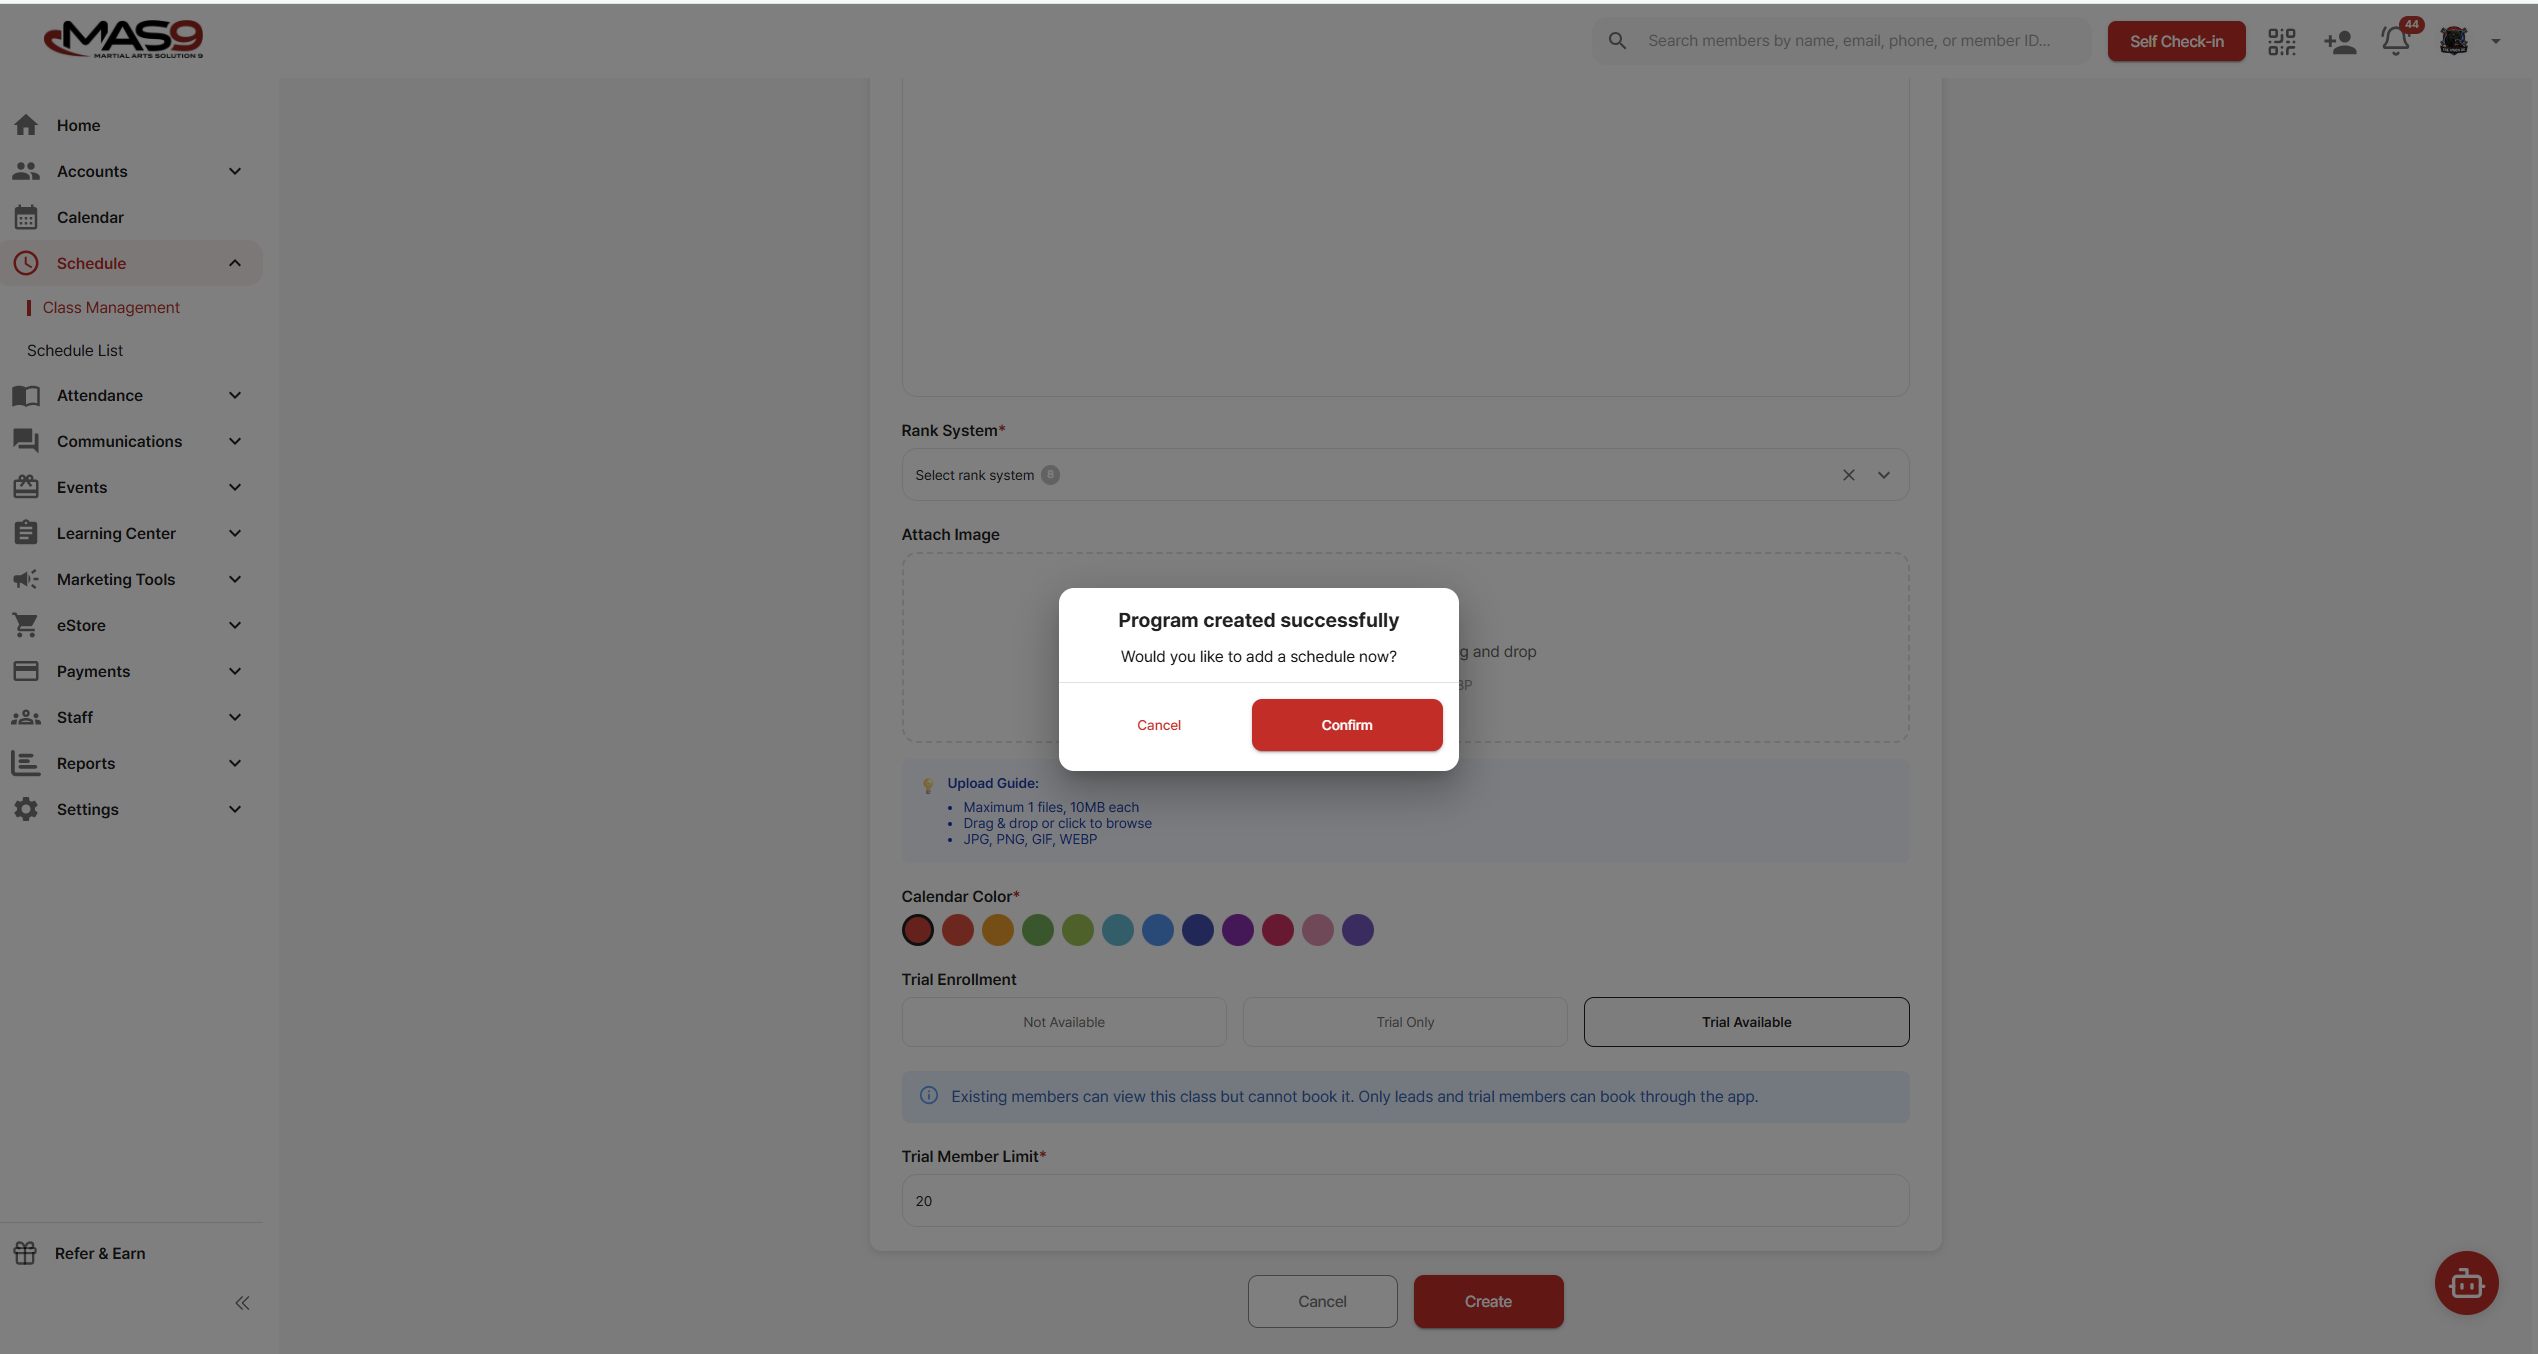
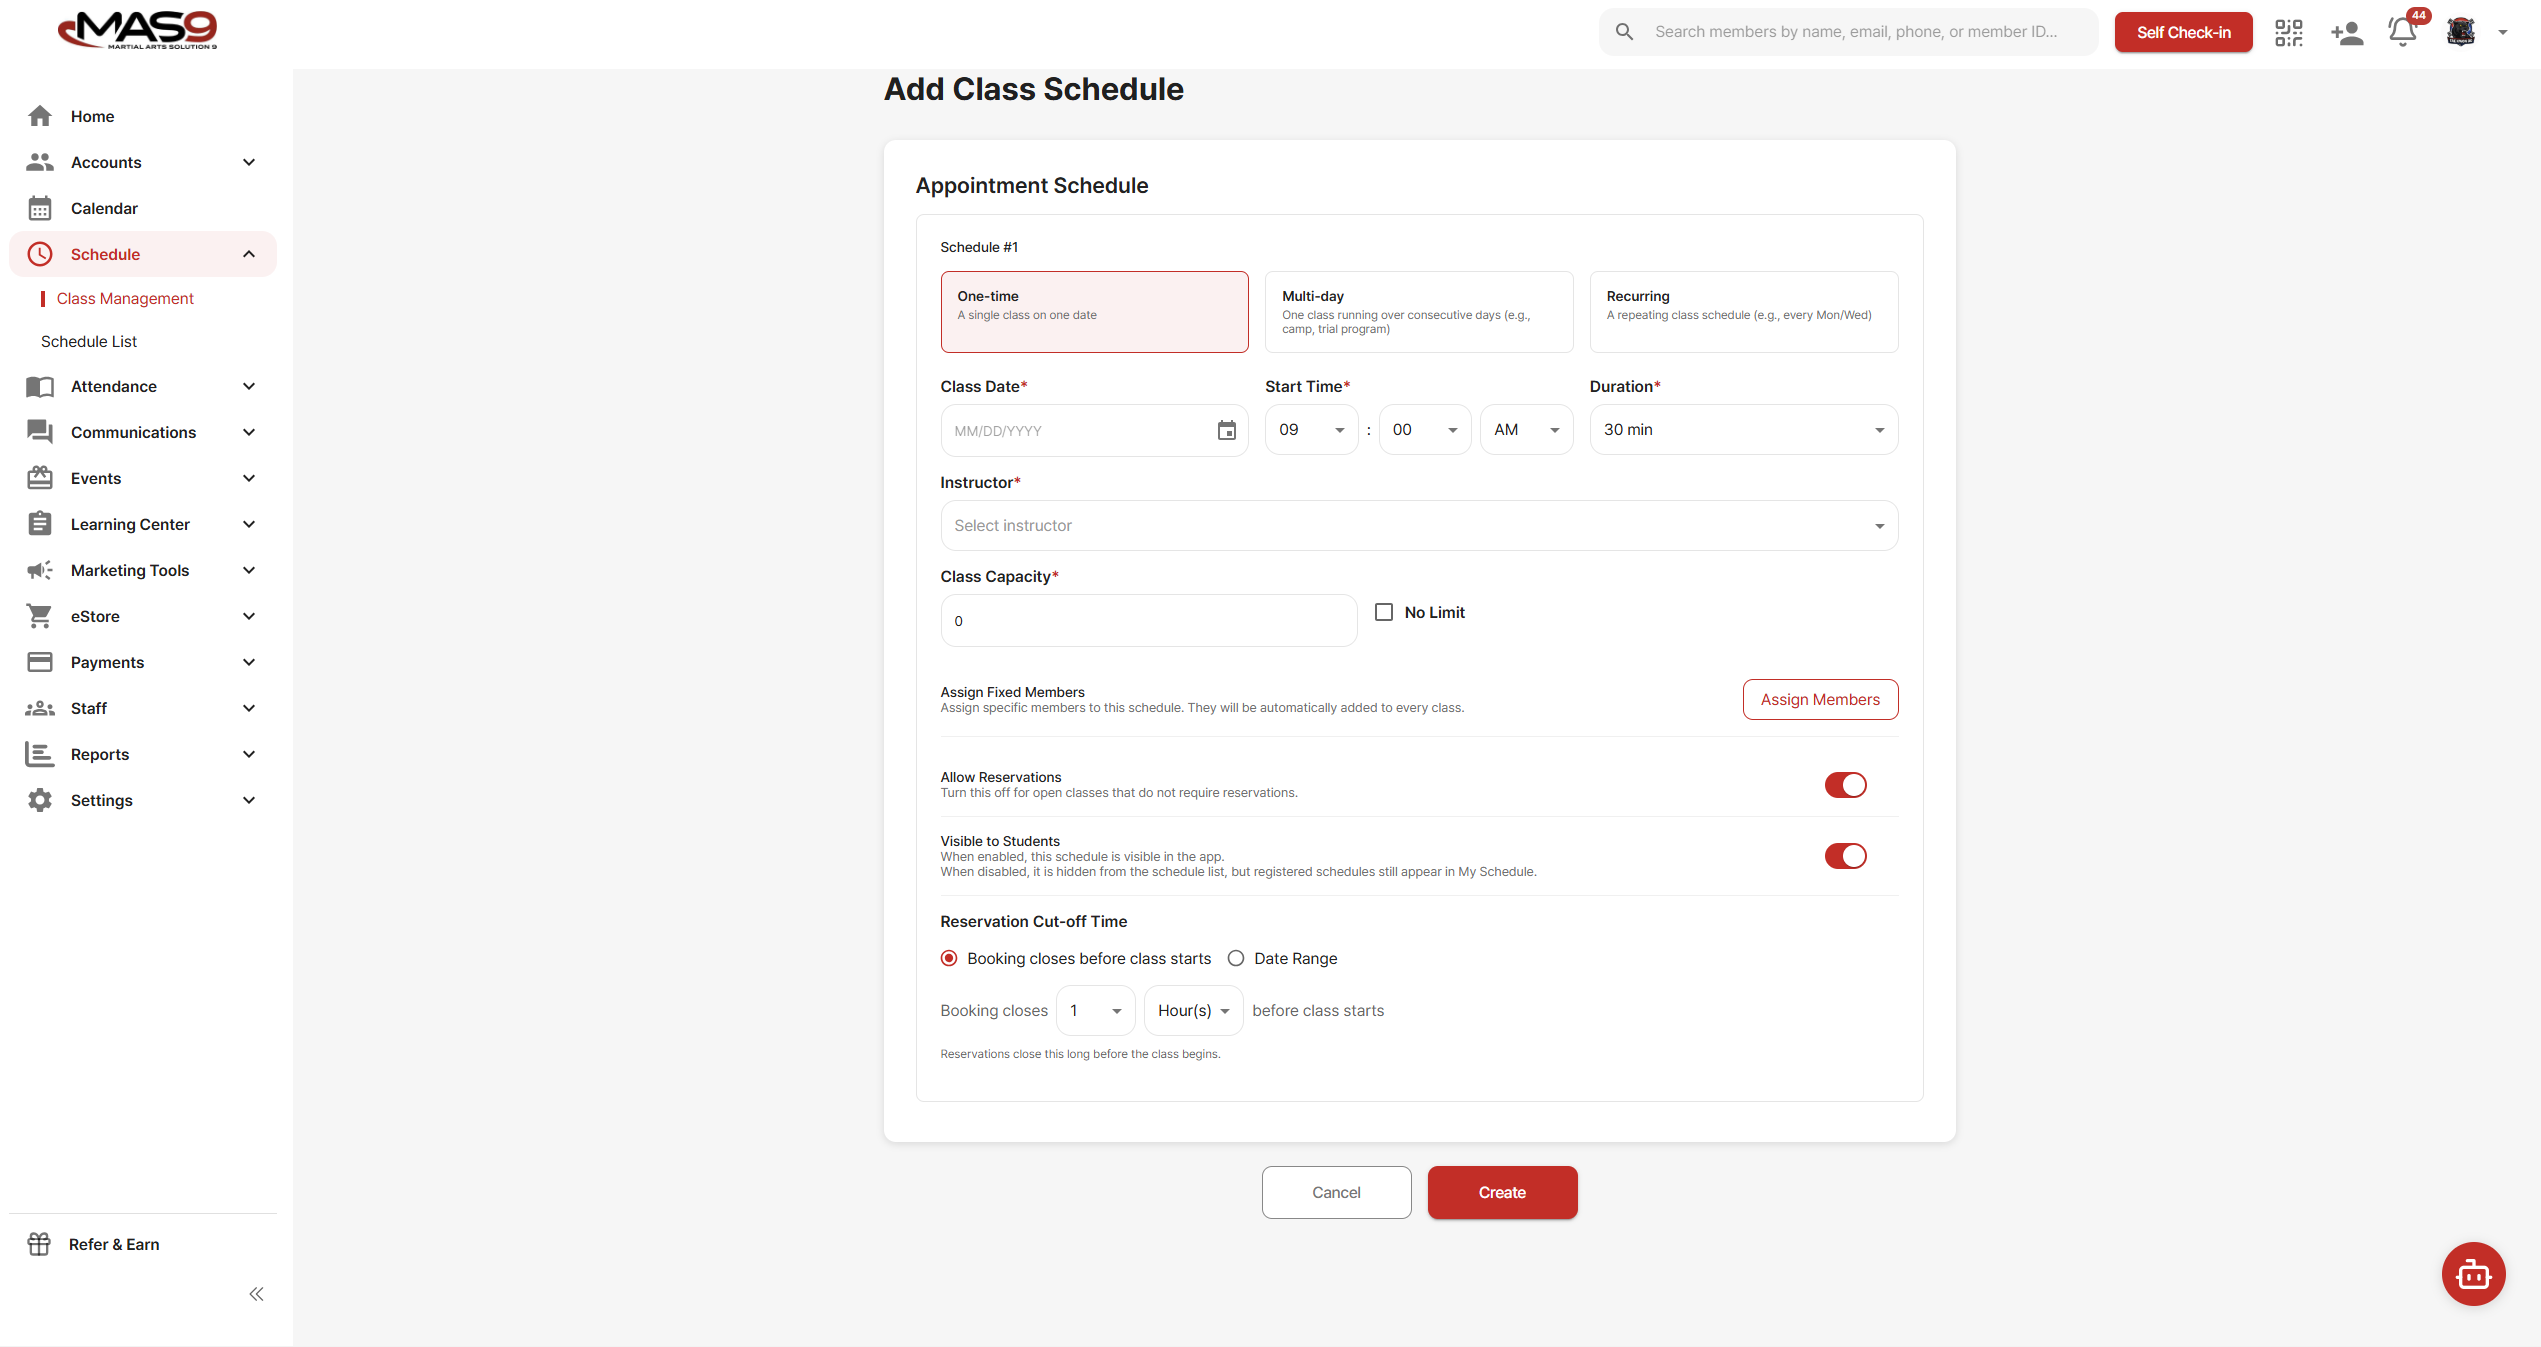
2. Add a Schedule
After creating the program, you’ll be prompted to create a schedule.
Choose the format that fits your class:
- One-time
- Multi-day
- Recurring
Fill in the required details such as date, time, instructor, and capacity.
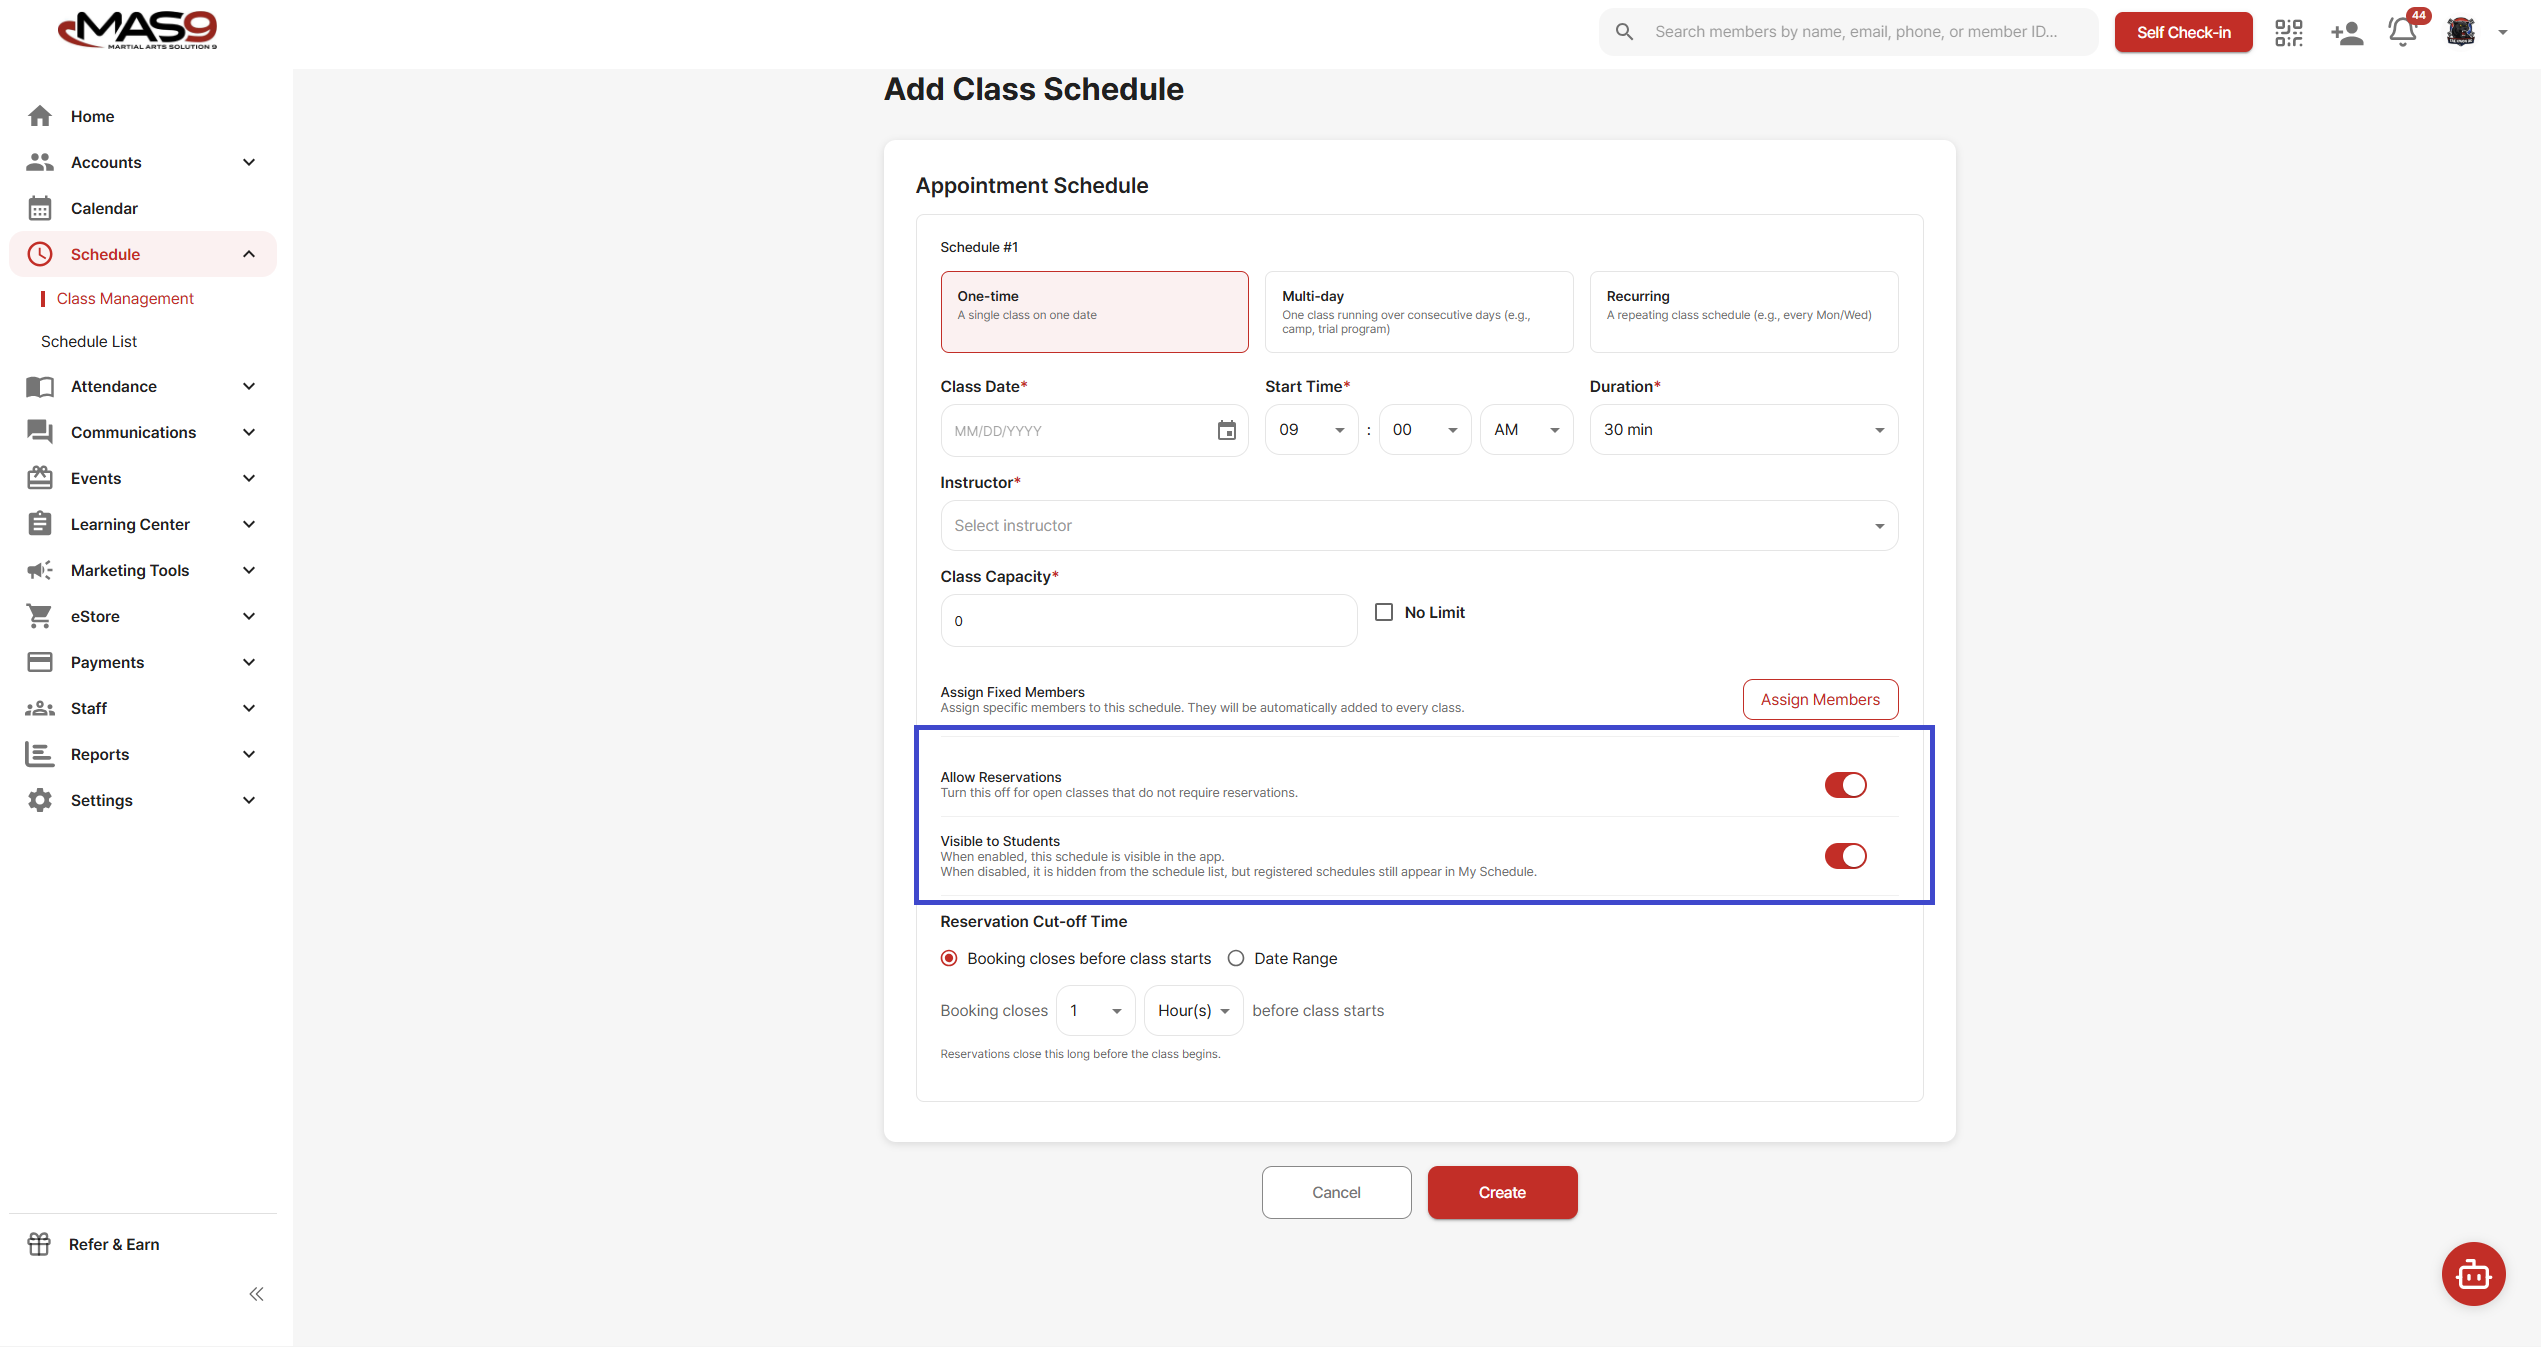
3. Enable Reservations and Visibility
For trial classes to work properly with website leads, both of the following must be turned on:
Allow Reservations
This allows users to book the class.
Visible to Students
This makes the class appear to leads after they submit the website form.
If either of these is turned off:
- The class may not appear to leads
- Or they won't be able to book it
4. Create the Schedule
Click Create, then Confirm to finalize.
5. What Happens Next
When a lead submits their information through your website:
- They will see available trial classes
- They can select and book a class
- Their information is saved in MAS9
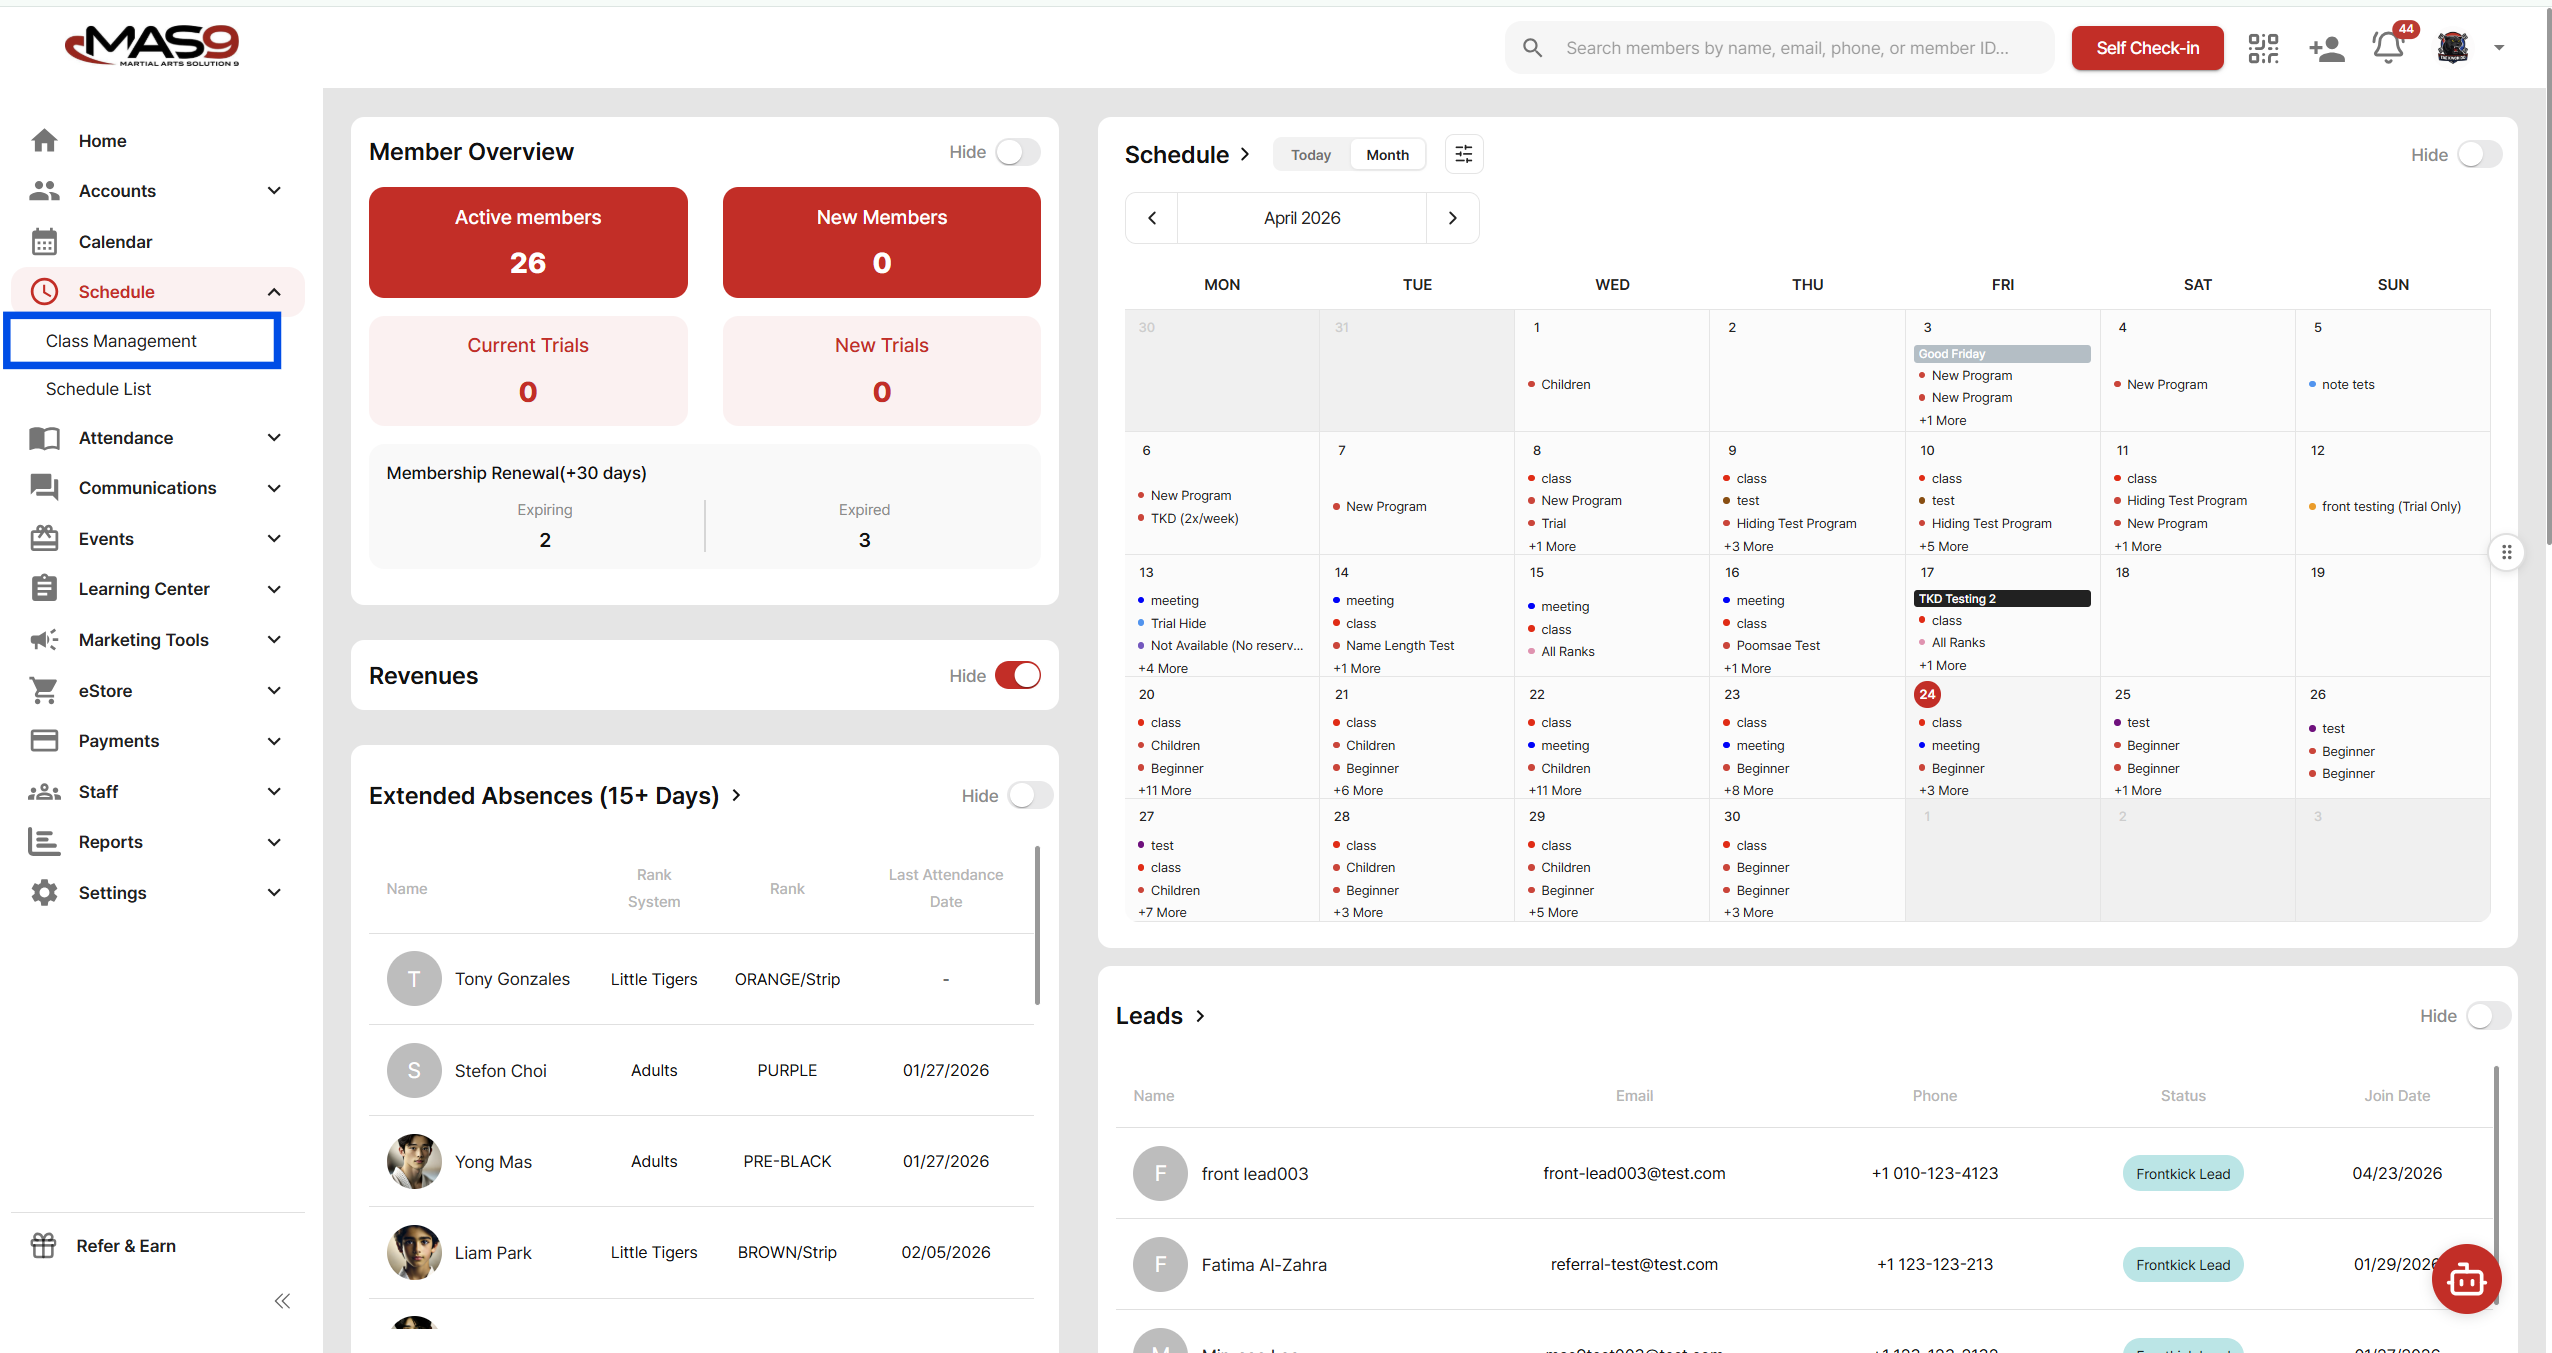
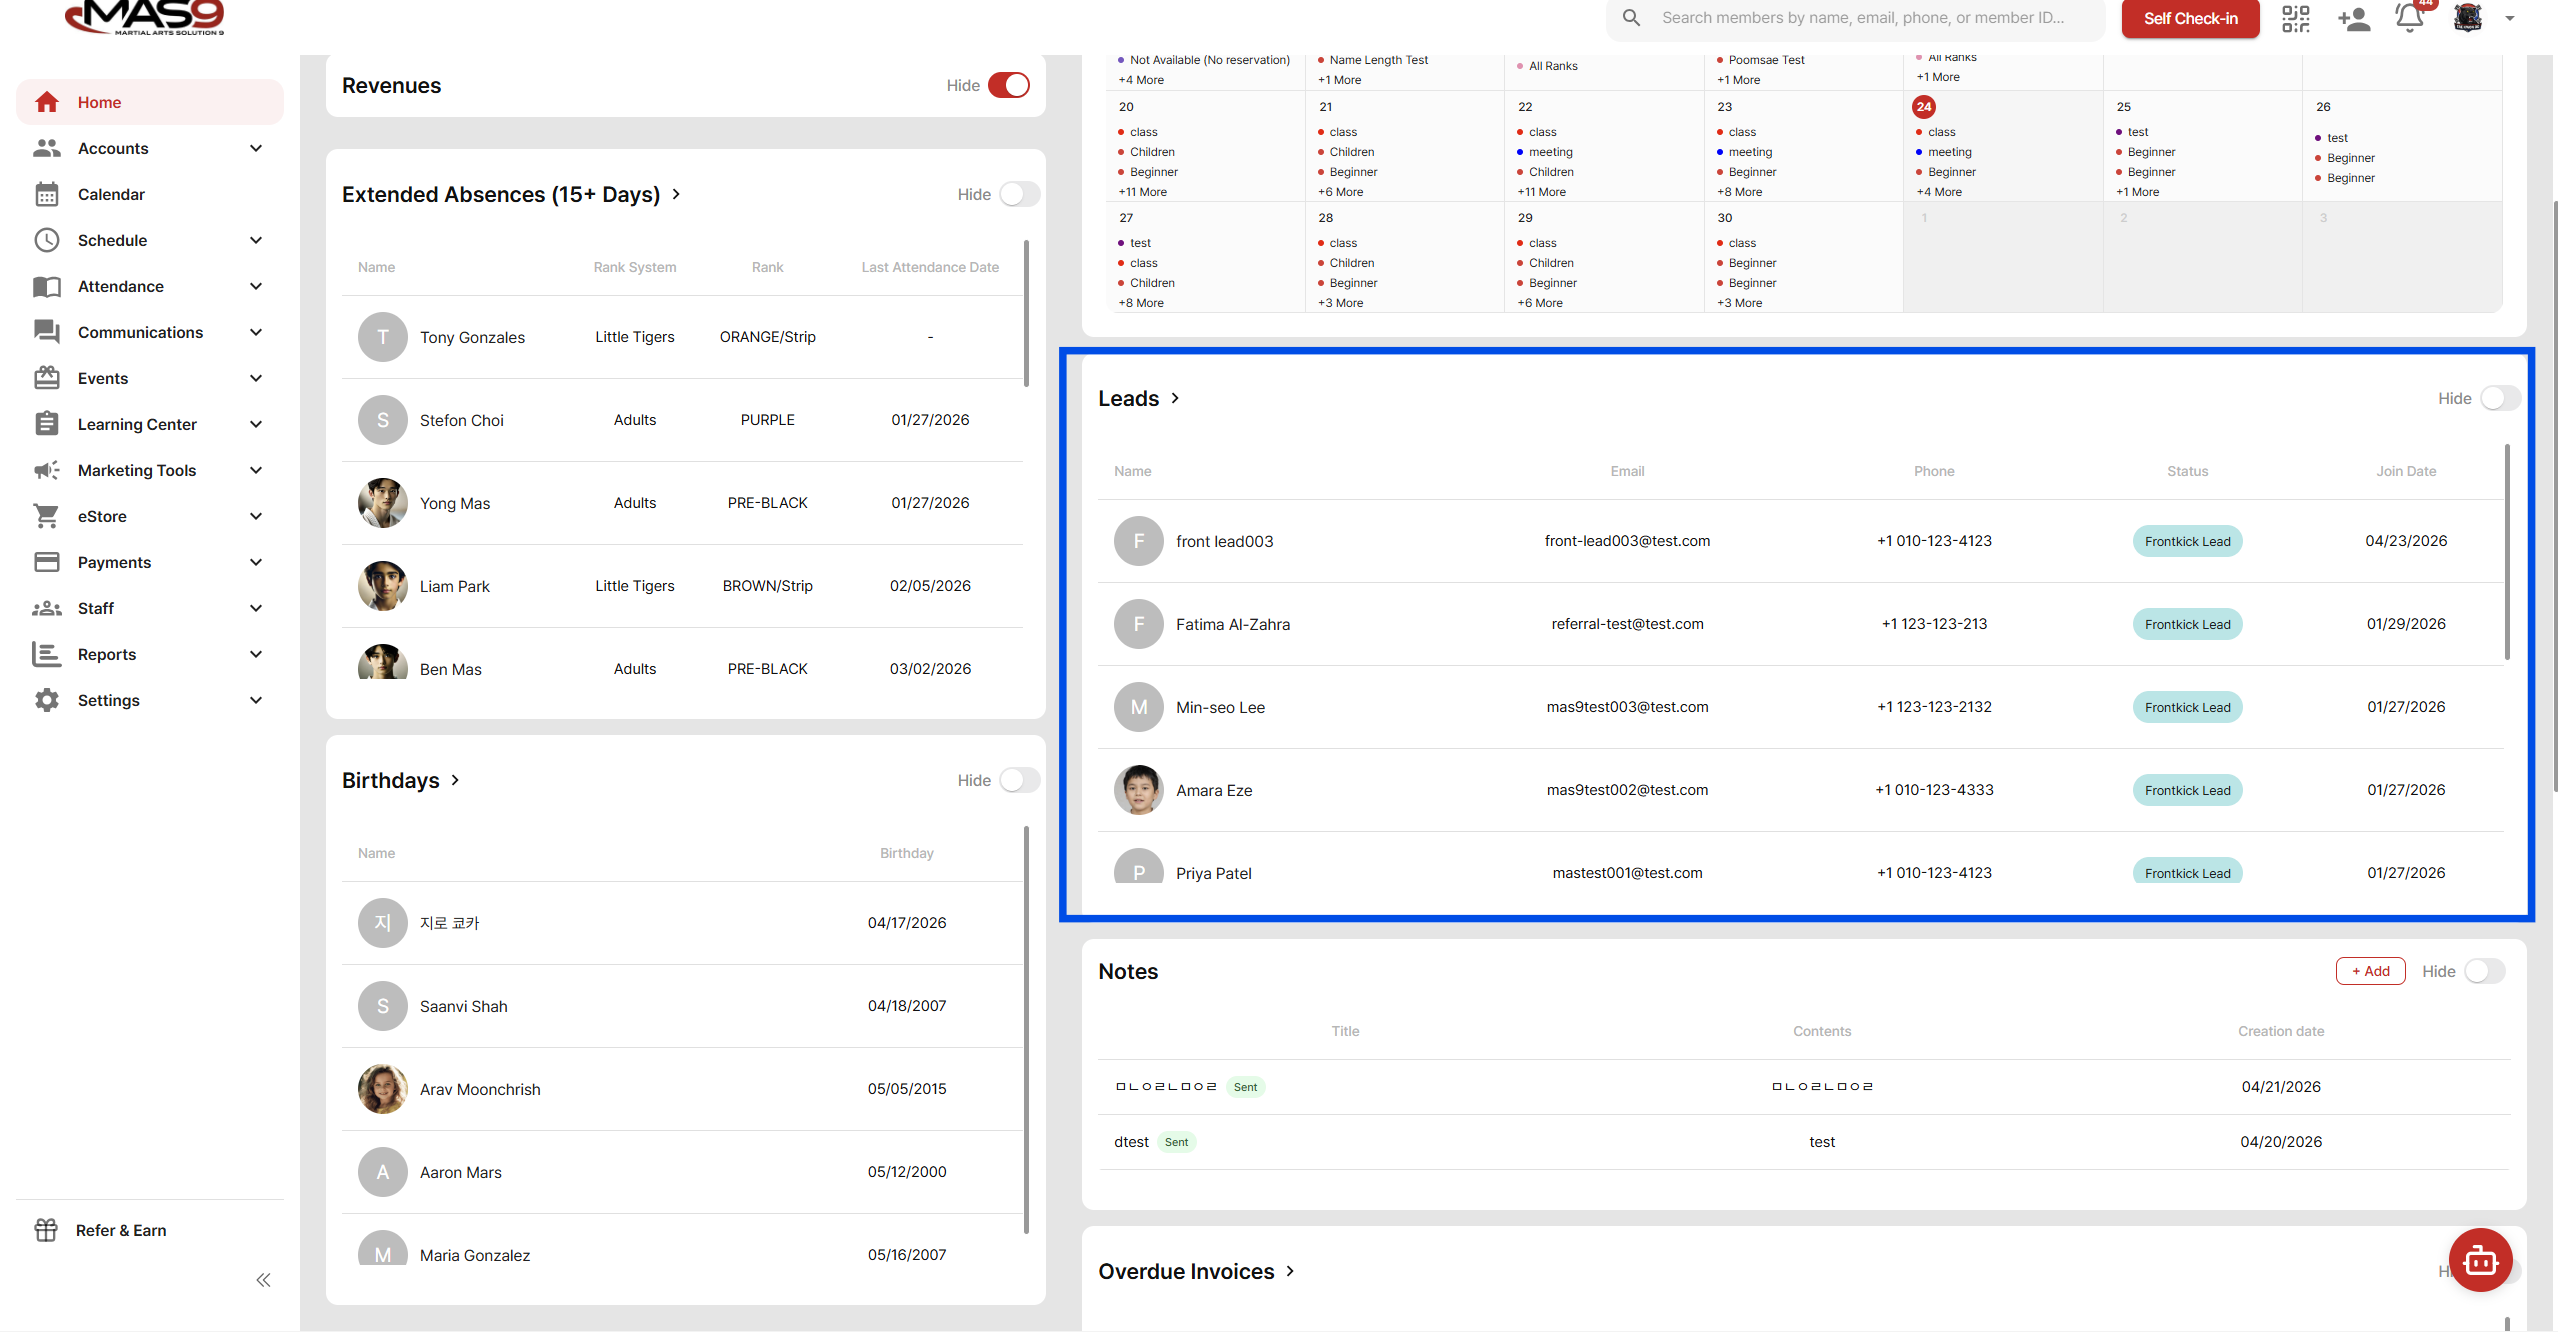
6. Viewing Website Leads
You can find new leads under:
Home → Leads
Leads coming from your website will appear with the status “Frontkick Lead.”
Notes
- Use Trial Only if you want to separate trial students from regular classes
- Use Trial Available if trial students should join existing classes
- Recurring schedules are typically recommended for consistency
- If the setup is complete and a class is not showing on the website, check that both Allow Reservations and Visible to Students are enabled.